how to draw a 3d room in photoshop
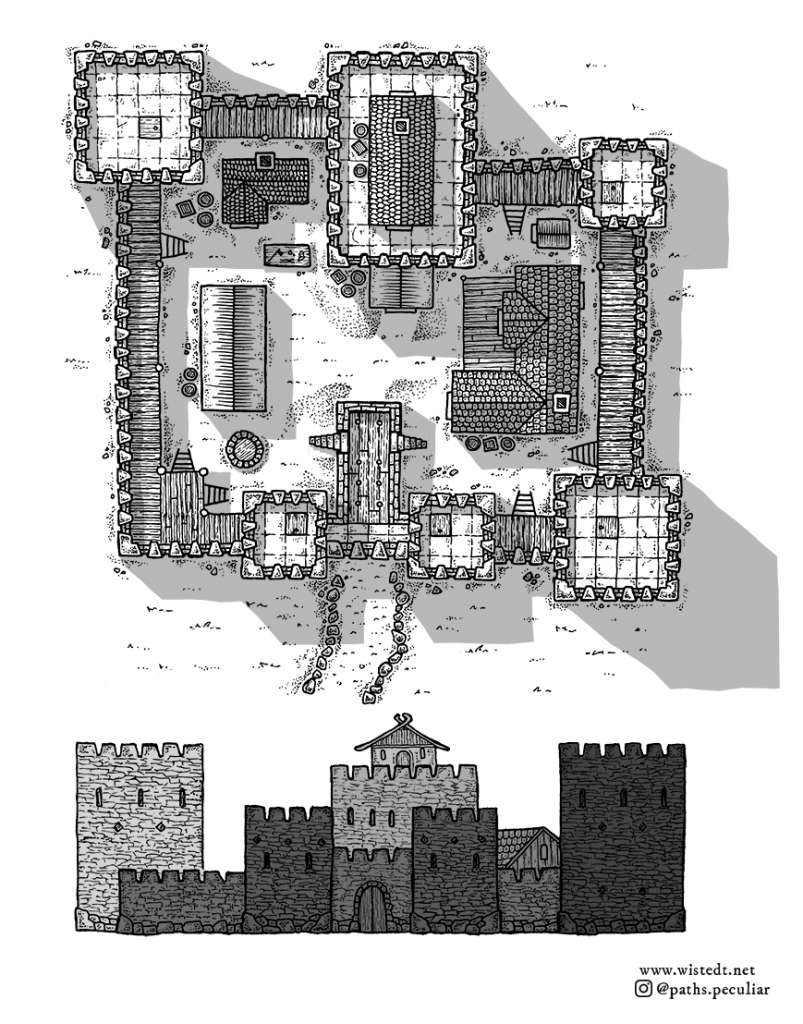
This tutorial will teach yous how to draw a basic fantasy medieval castle. I volition exist focusing on the ii nearly obvious defensive elements of the castle; walls and towers. Past learning to draw walls and towers, y'all will be able to combine these two basic structures into many different castle, keep and stronghold designs.
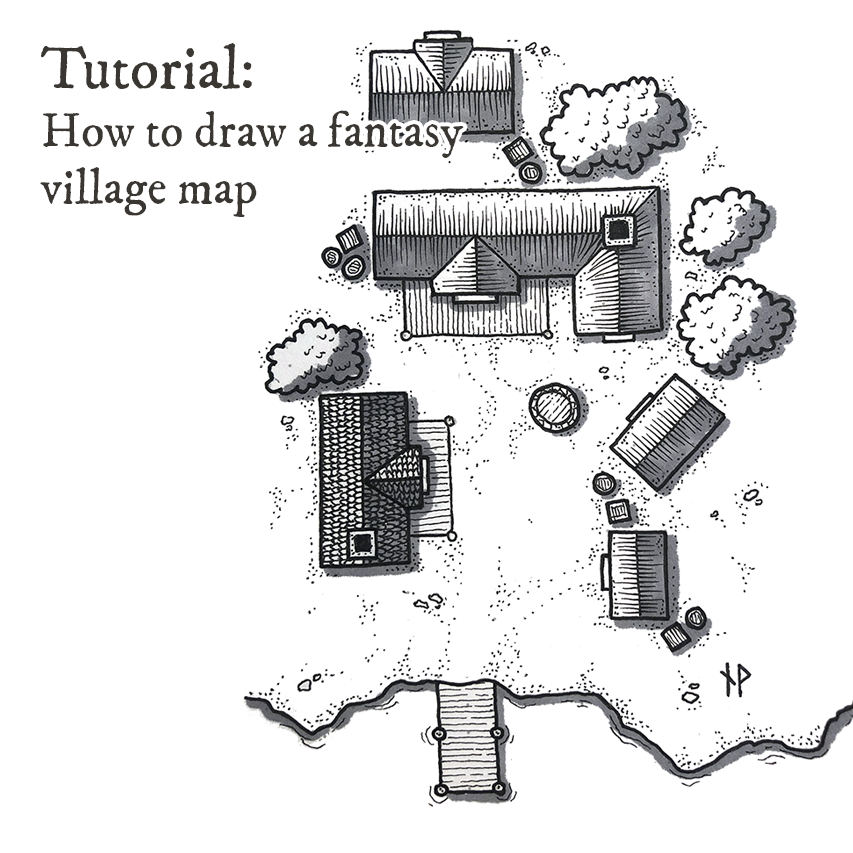
The walls and towers you are about to learn to depict works very well with the buildings in my fantasy village map tutorial.
But let'due south get-go with the basics, shall we?
Tools for map making
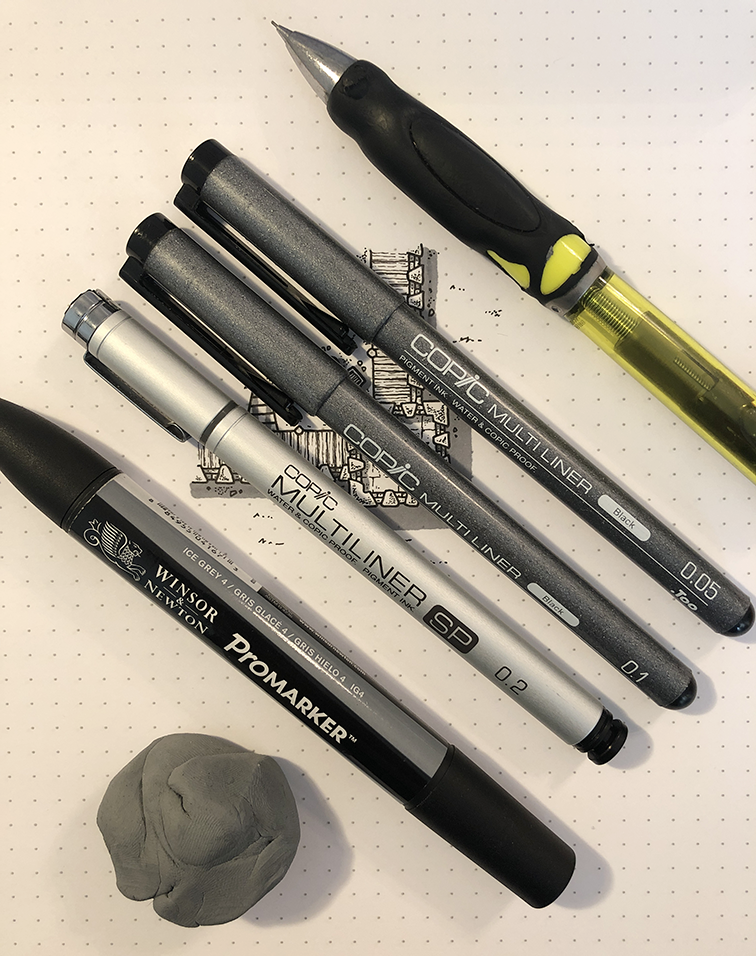
For this tutorial, I'1000 working with the following tools:
- Rhodia DotPad
- Copic Multiliner (about brands of fineliners such as Pigma Micron or Staedtler will do just likewise) of sizes 0.2, 0.1 and 0.05
- Winsor & Newton Promarker
- Kneaded eraser (whatever eraser volition do)
- Pencil
Step ane – describe the basic castle layout
Depict yous bones castle layout with a pencil. Don't push besides difficult, you will demand to erase some of these lines afterwards. Combine walls and towers to create the design yous want. Make certain you lot leave plenty room inside the walls should you want to add structures at that place, like houses or a fortified tower.
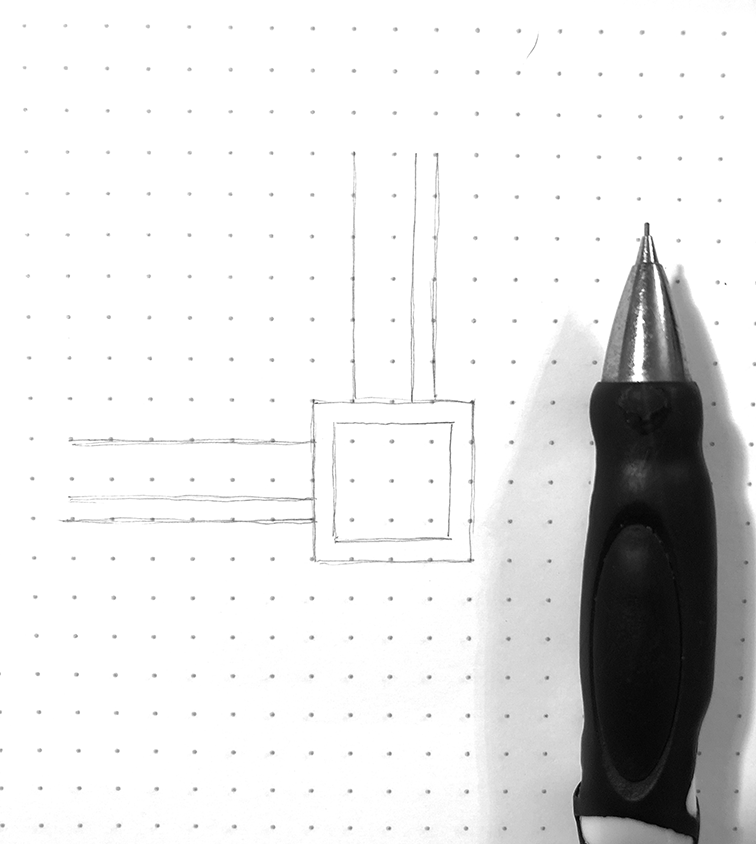
Step 2 – add crenellation to the battlements
Withal pencil. Depict the type of crenellation yous desire for the wall and towers. I've decided to get with triangular shaped "merlons" to give defending archers an advantage (more room to aim, while harder for attackers to hit the gap from the outside). There's room for creativity here, so feel complimentary to play around with different designs!
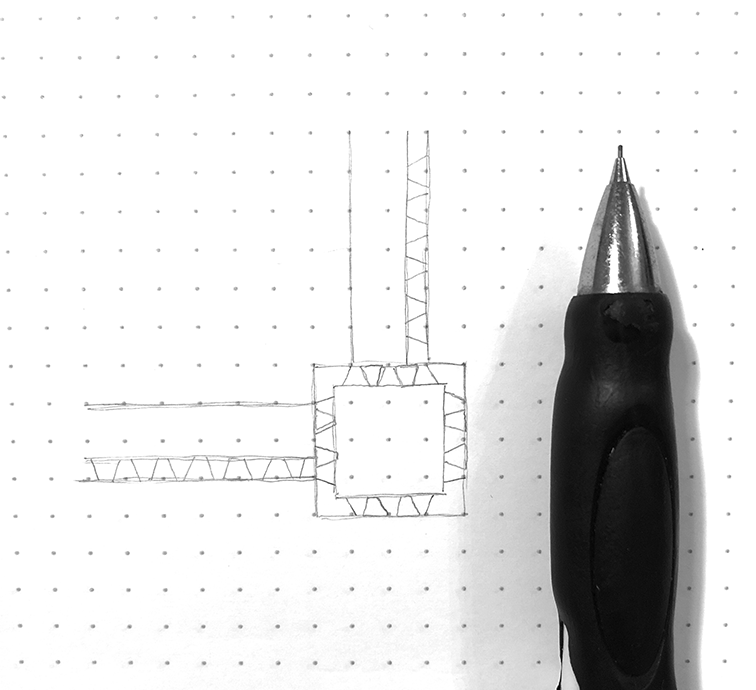
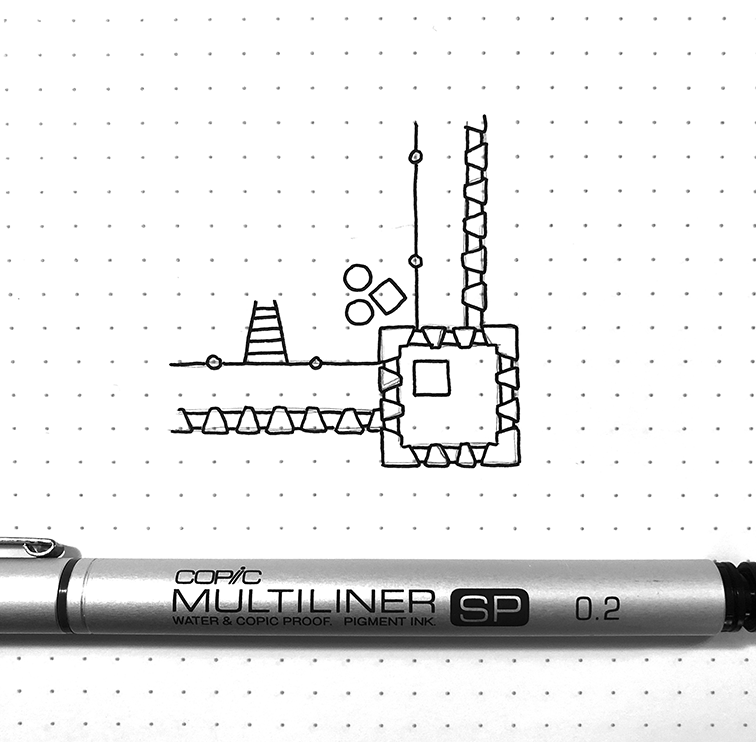
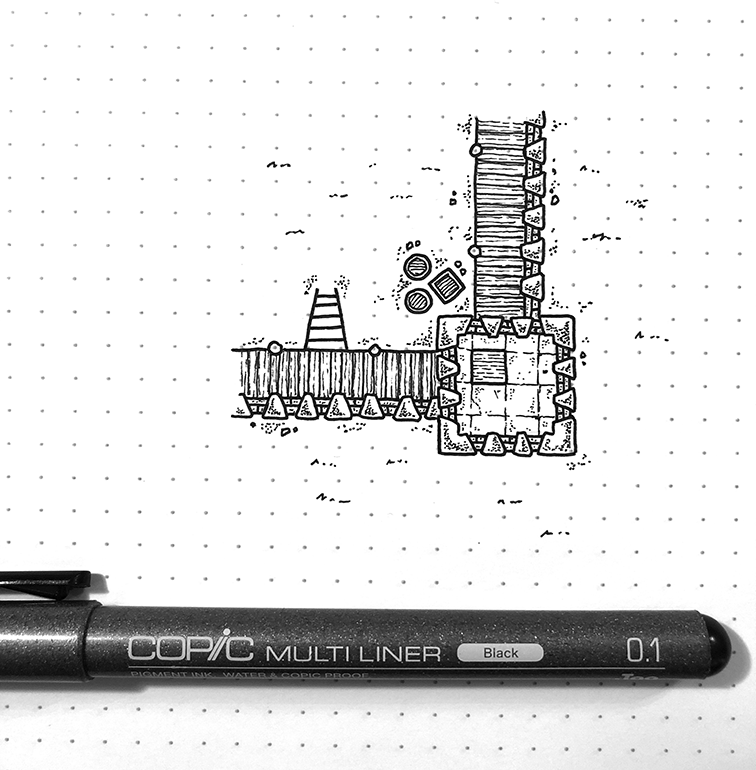
Footstep 3 – ink outline of merlons
Use a 0.2 pen to draw the ink outlines, kickoff with the merlons to avert whatsoever mistakes. This is a quite straightforward step, just it requires some concentration. Don't use a ruler – some imperfection makes it look more organic.

Pace 4 – rest of outlines
Depict the rest of the outlines with a 0.two pen. Again, quite straightforward. I added some supporting poles for the wooden walkway, besides every bit a ladder and a few barrels and crates for flavor. I also outlined a hatch in the tower floor.
At the end of this step, wait for the ink to dry (give it a couple of minutes) and and then carefully erase whatever visible guides yous drew with pencil. If you damage the ink outline, just ready it with a smaller pen – no biggie.
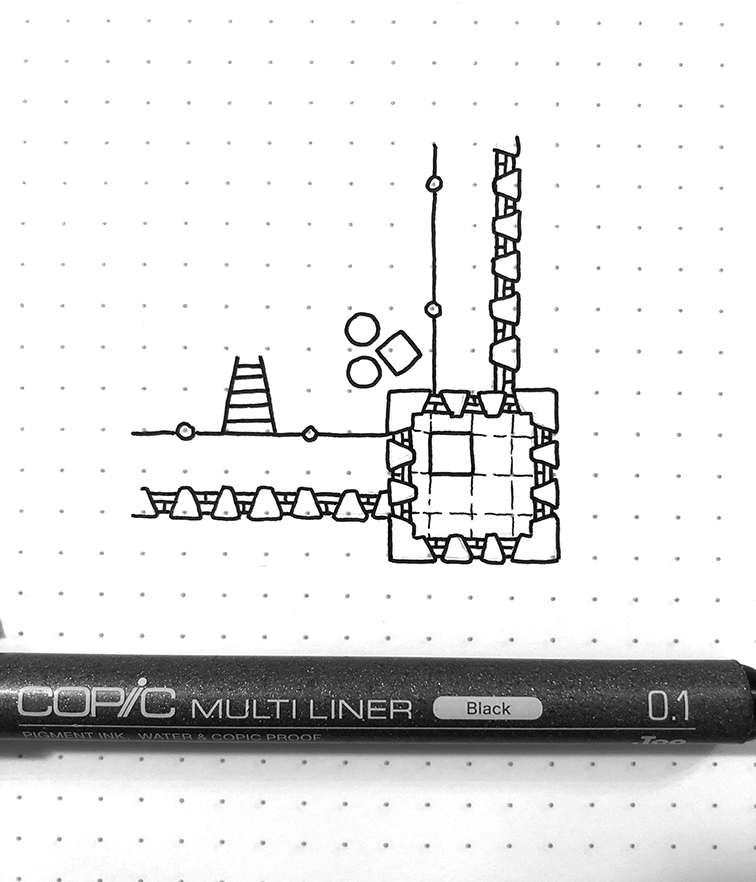
Step 5 – depict bricks and flagstones
Employ a 0.1 pen to describe bricks in the wall visible in the crenels (the area between the merlons). Utilize the same pen – merely less pressure – to describe flagstones in the tower floor (unless you prefer a wooden floor, that is).
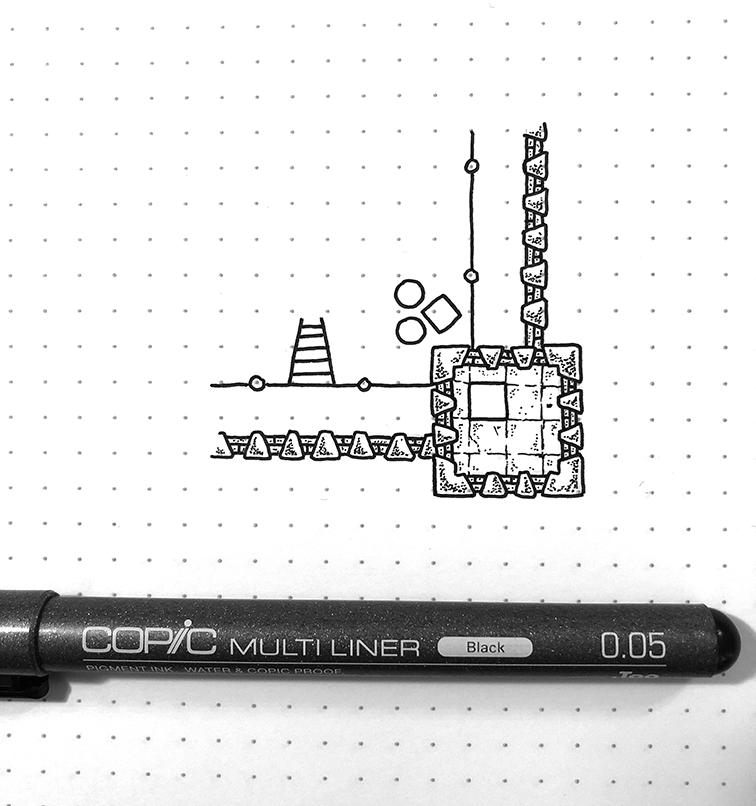
Step half dozen – stone texture
With a 0.05 pen, add dots and scratches to the stone parts of the map: crenels, merlons and flagstones.
Pace vii – forest texture
Draw forest grain on the walkway and tower hatch with your 0.05 pen. It's basically simply parallel, slightly shaky, lines fatigued with very trivial pressure practical. It's not hard, only you lot might want to practice this a little scrap on a separate newspaper earlier doing it on your map.
To create the expect of planks (shown on the correct walkway) merely describe a few lines applying slightly more pressure than when you lot drew the grains.
Add together some grain to the barrels and crates as well.
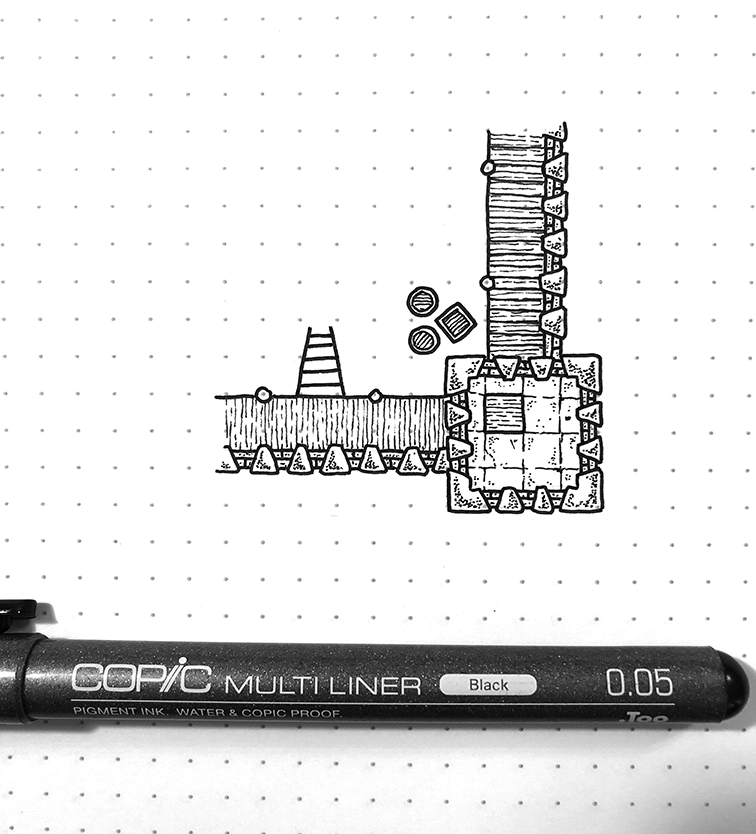
Footstep 8 – ground clutter and texture
Just add some dust and scratches, pocket-size patches of grass, gravel and stones to the ground to give information technology a fiddling bit of organic feel. You don't demand to overdo this, but accept your time. Maps lacking this kind of "ataxia" ofttimes feels a bit unfinished.
Step 9 – shadows
Employ a gray marker to add shadows to the map. Decide where your light source is, and so draw shadows on the opposing sides of elevated objects. In this instance, I decided the light source was in the upper left corner, and so shadows were added to the correct, and below, the walls and battlements.
Taller objects has longer shadows – compare the wall shadow to the tower shadow, for case.
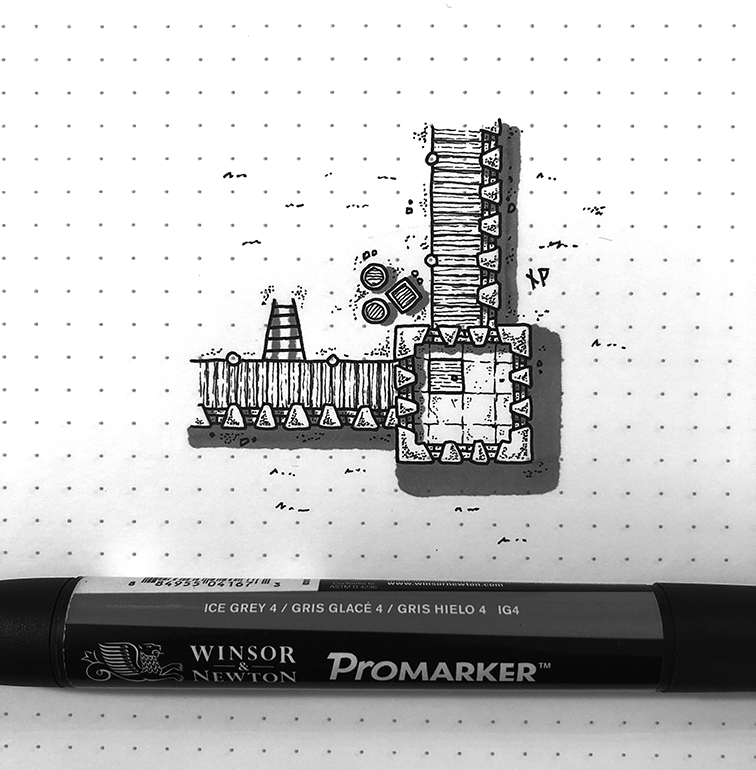
And that's bascially it! That's how you draw walls and towers. This is the bones technique I use, and I utilise combinations of these walls and towers to create larger castles.
Actually promise you lot enjoyed this tutorial!
Alternative fashion of adding shadows – using Photoshop (or like software)
For many of my maps, I choose to add the shadows in Photoshop afterwards the cartoon is completed. While non as fun as drawing them by mitt, it helps not to accept any greyness parts on the drawing when you scan/photograph it. I create the (flat grey) shadows in a split up layer, and then modify the layer fashion to "multiply". I and then adjust the opacity of the layer to go the correct intensity of the shadows.
Support my piece of work – purchase me a beer (if you want)
If you like my stuff and desire to give me a tip to cheer me on, delight click the button below.
Please note that tipping is of course appreciated but not in any mode expected!
More tutorials:
Source: https://www.wistedt.net/tutorials/tutorial-how-to-draw-a-fantasy-castle-map/
Post a Comment for "how to draw a 3d room in photoshop"